
I got the idiotic idea of spending much of my weekend making some new lights for my home office out of some Ikea picture frames...
This came about because the tightwads who built my gaff in the '70's figured they could save a few house bricks by making the garage reeeeally narrow which meant if you squeezed your average motor into the thing then aside from scraping the paint off your wing mirrors, you wouldn't actually be able to open the car door to get out and would have to scrabble out of the sunroof - a rare and leaky luxury itself back in those days of British Leyland.
After using the garage for a while as a convenient place for the storage of junk and the (not so convenient) breeding of spiders, in 2004 we decided to convert it into an office....
..well, I say "office", more junk room but with a desk, a Rolodex, three calculators and slightly fewer cobwebs in there.
Originally I put in fluorescent lighting, but during a revamp around 2011 I changed to LED downlights. These saved a bundle in electricity, but the R63 LED lamps I used at the time had a very narrow beam angle making the upper part of the room quite dark. I recently decided to pump the brightness back up to eleven by using the latest LED technology... and some random cack from Ikea.
In the spirit of all the best home inventions, some self-assembly upon the kitchen table was required.
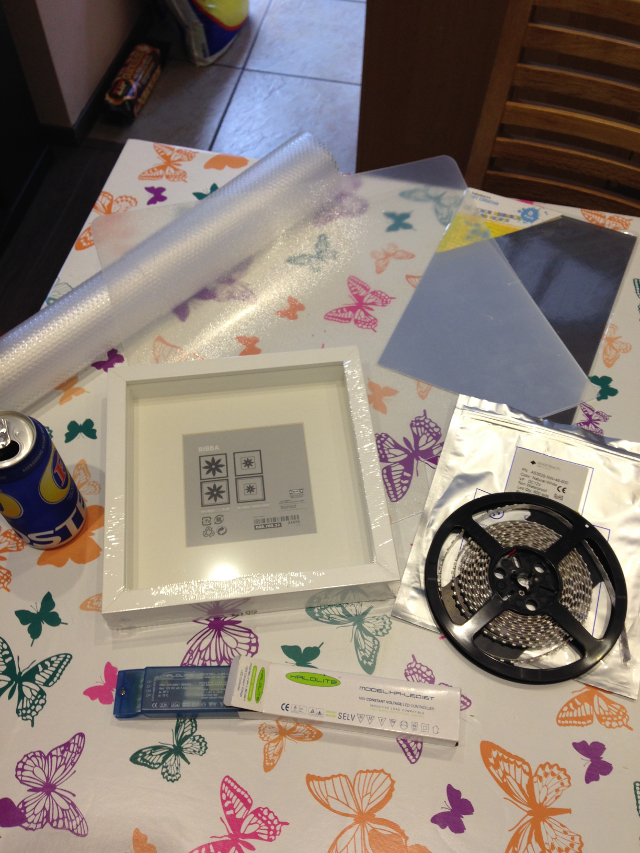
Apologies for the tablecloth which, I can assure you, is the wife's choice. Anyway, the list of ingredients for this project is one 5m reel of natural white 600-LED tape, one 16W Halolite constant voltage LED driver from ElectricFix, one pack of mirror card from Sainsbury's and, from Ikea, one RIBBA picture frame, a roll of VARIERA drawer liner and a PROJS desk pad.
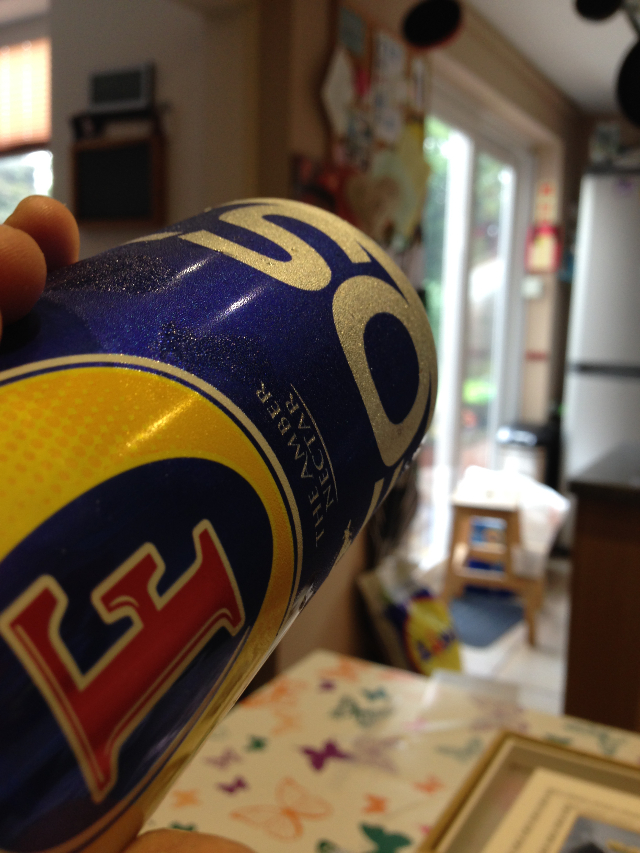
Open or not, the can of Fosters is optional but recommended.
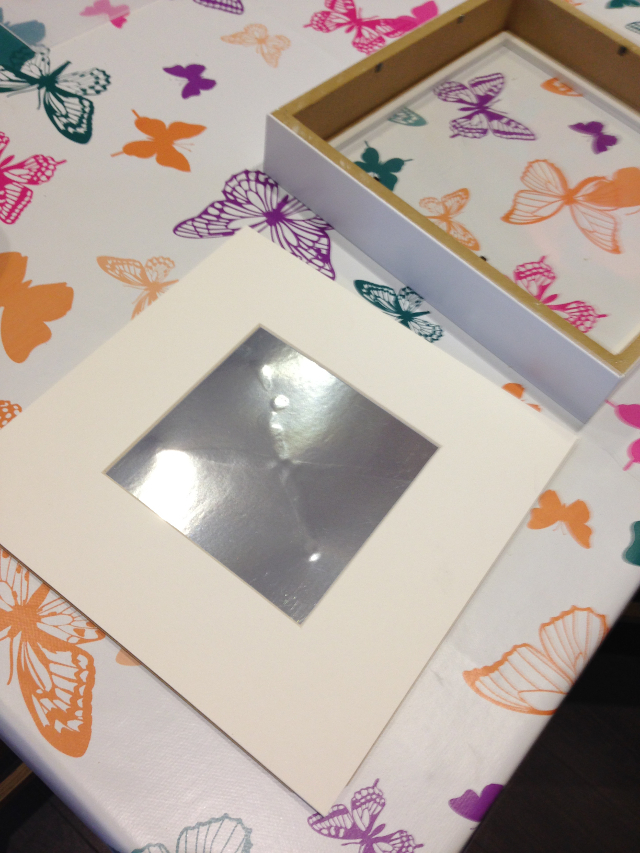
Step one was to glue some of the mirror card behind the cardboard insert within the frame where a photo is supposed to go.
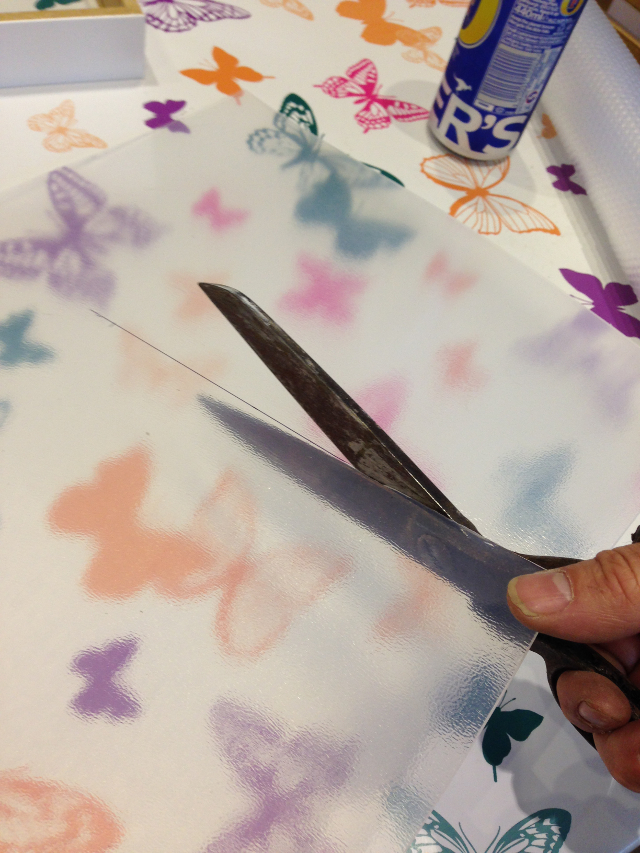
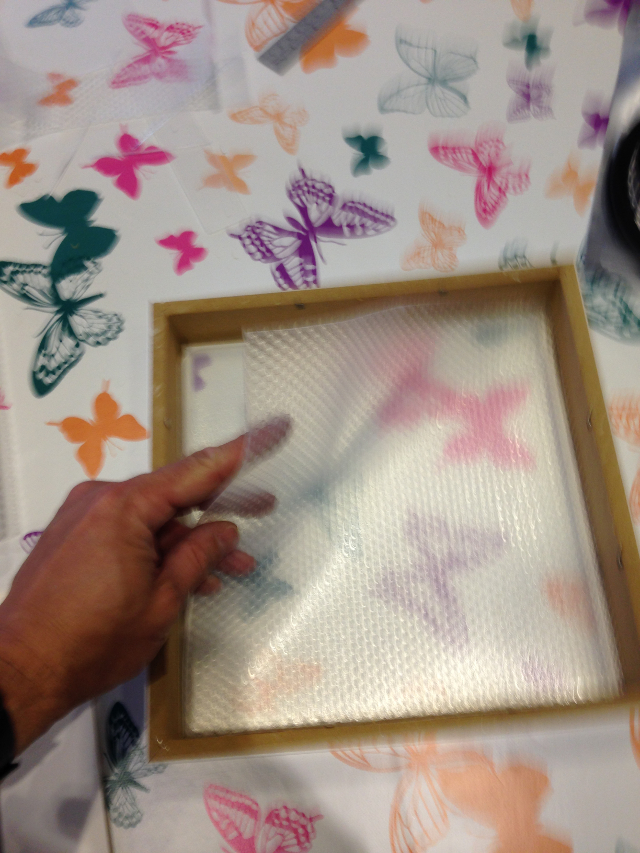
Step two was to cut a slice from the PROJS desk pad wi' my big rusty scissors so that it would fit behind the glass within the frame. This is to provide some opacity as the LED strips aren't the prettiest things to look at directly.
Step three involved a massive swig of lager....
Step four is to push past the blurred vision from the lager and to cut the VARIERA drawer liner to also sit within the frame on top of the PROJS sheet. While adding to the opacity, the dimples on the VARIERA will help to diffuse the light... or something.
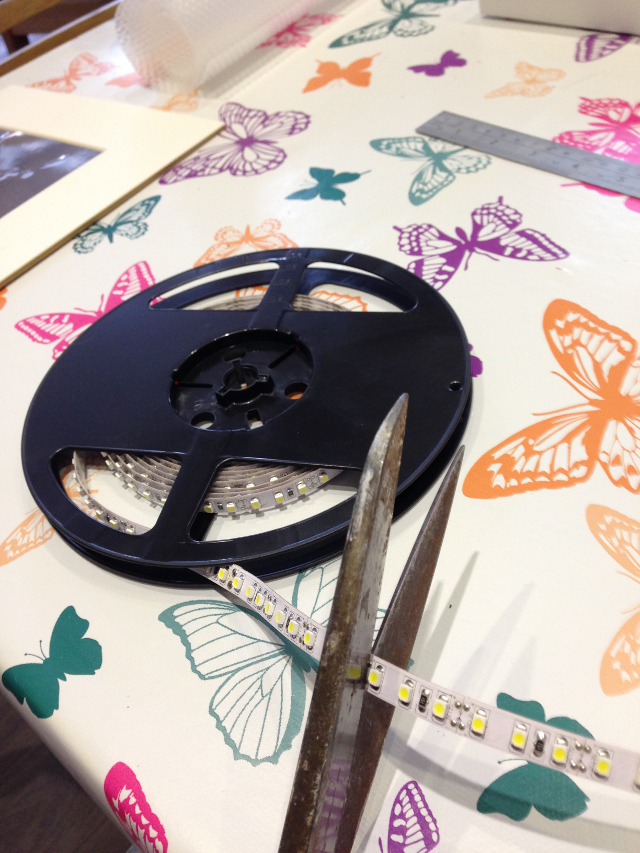
Step five is to cut the LED strip to size. Supplied on a five metre reel, this model can be cut every three LEDs (approx every 25mm). I'm going to lay out two square pattens of strip within my RIBBA frame...
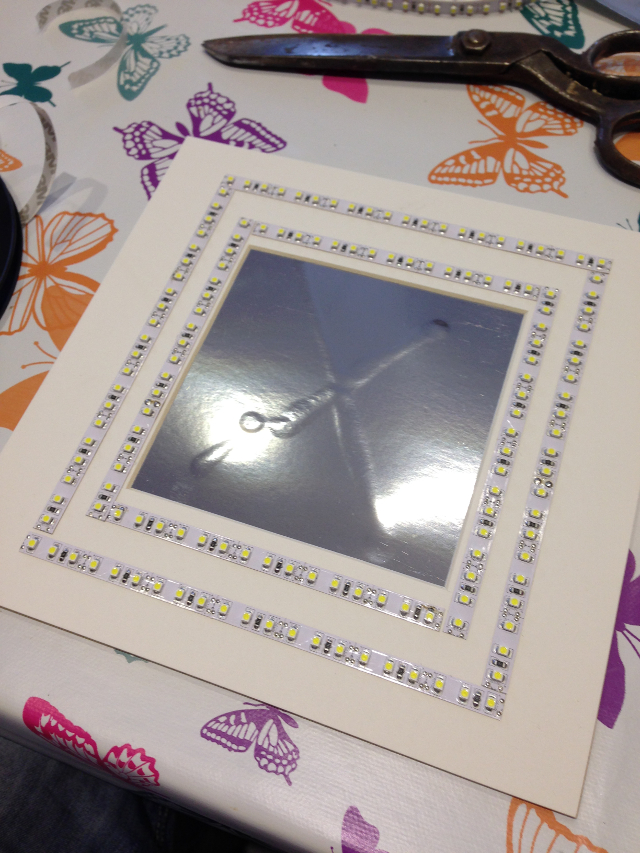
..as can be seen below in step six. The LED strips have good 3M adhesive backing allowing them to be stuck almost anywhere.
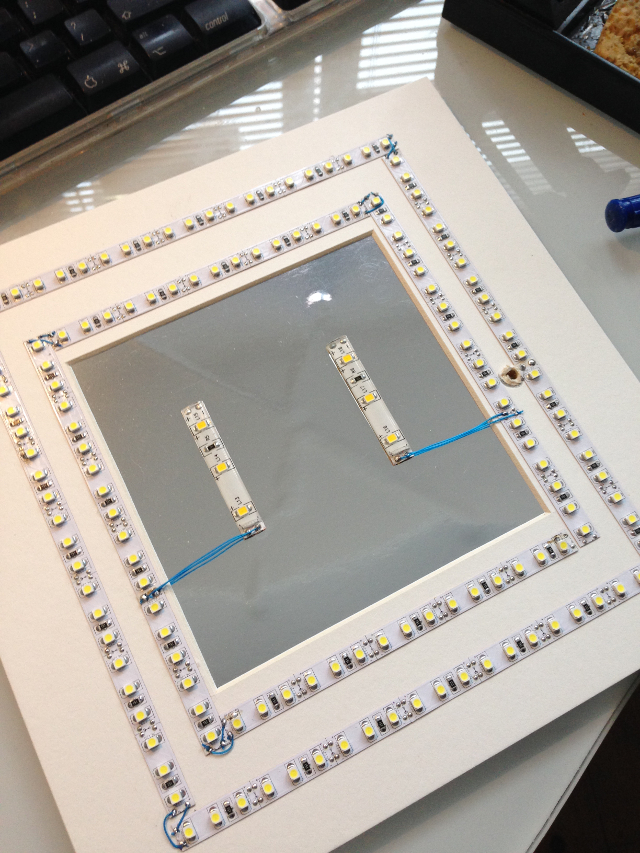
Step seven sees the individual strips connected together using some 0.25mm wire. I've also added two central pieces which are offcuts from another LED tape strip, albeit a 300 LED IP-rated warm white model which will give a slightly different appearance when illuminated.
For step eight, the RIBBA frame is reassembled and a connection is made from the LED strips within to the constant voltage driver outside. My meter shows a consumption of 14-15W (including driver) when hooked up. If undertaking a similar project you must ensure the driver has the oomph for the load. I'm using a 16W Halolite driver but there are a range of them out there to choose from.
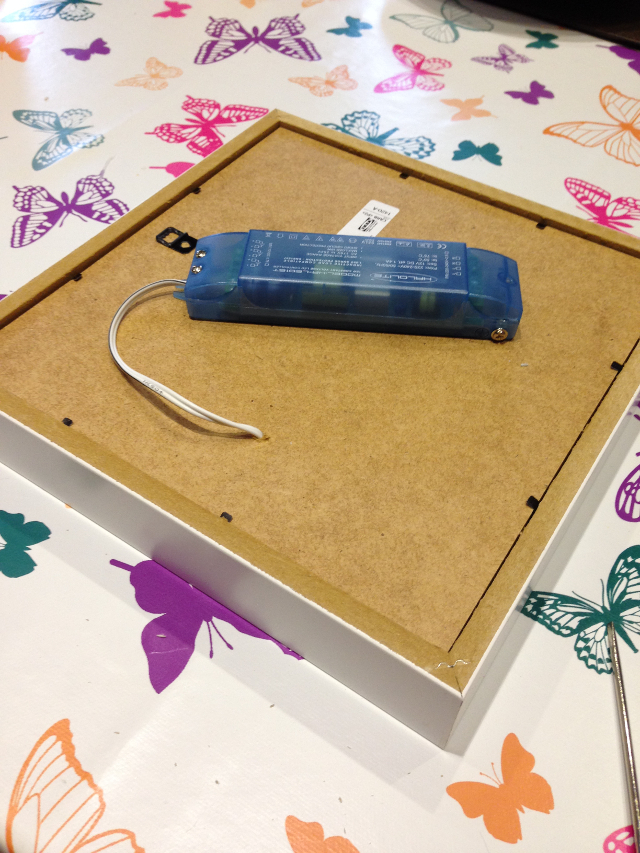
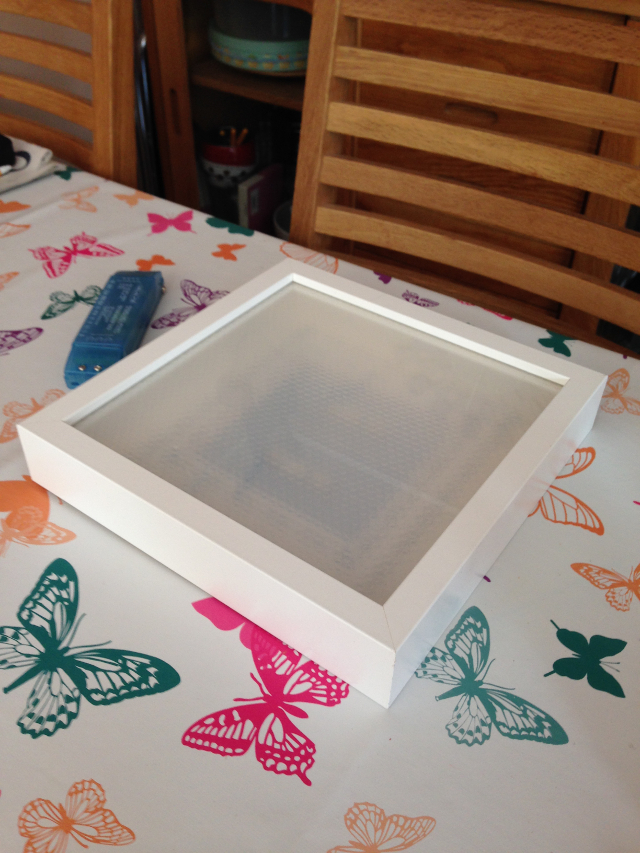
The fully assembled unit. The LED driver will sit above the ceiling via the hole from the old downlight allowing the RIBBA frame to be mounted directly onto the plasterboard.
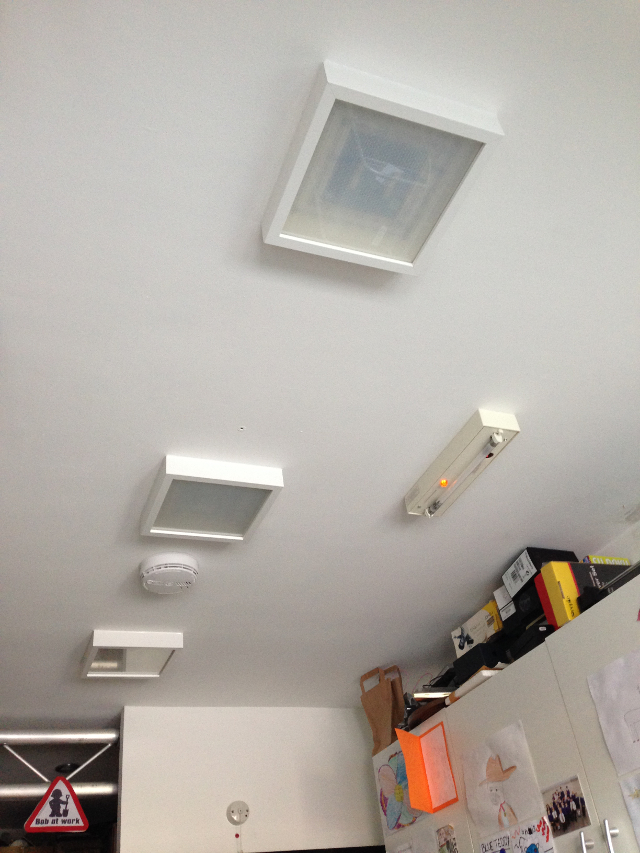
And here they are. I made three of them. To stick them up I used a hot melt glue gun for a temporary hold, then I applied a white silicon seal bead along their edges to both tie them in with the ceiling and provide extra adhesion. The fire hoods from the old downlights remain in place above them so the ceiling maintains its fire rating. It's all very Blue Peter.
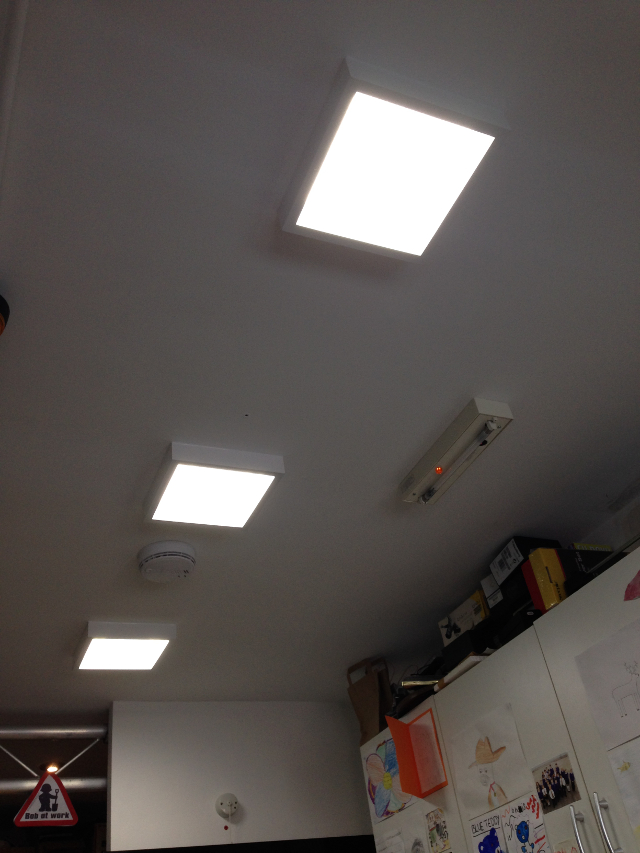
When on, they provide the full fabulosity, lighting up the room more efficiently than fluorescent equivalents and more brightly than the single LED spots they replaced.
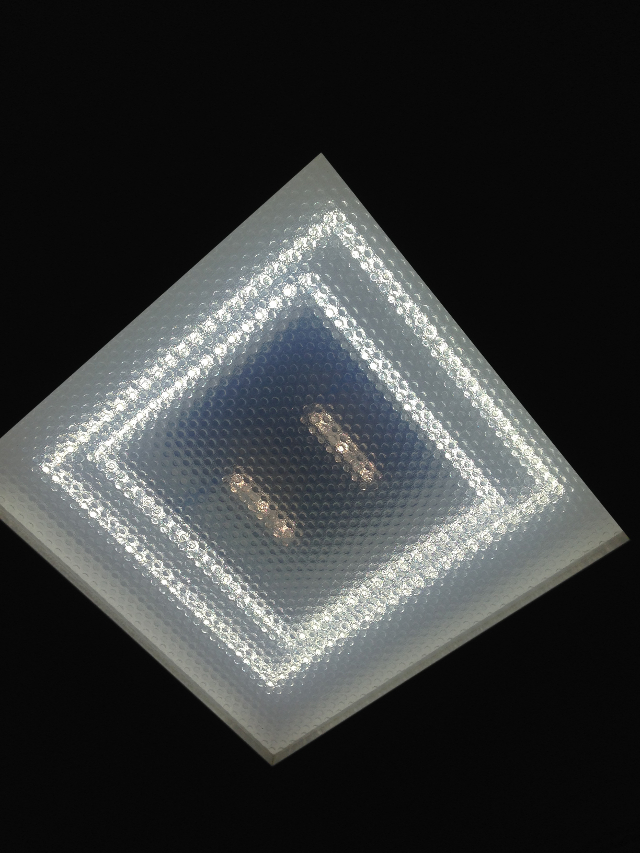
They also look pretty fab close up should you have the inclination to stick your face into one.
Anyway, the point is to show that the LED tape can be used to make all kinds of bespoke lighting. If you have everyday objects that can benefit from some custom sized illumination then the LED strip product is ideal. If you're not sure how to apply it, contact me for help!
A friendly message from David's lawyer:
Hey kids! How about that Pac-Man eh? And who doesn't love those 'Spaced Invader' chaps? I mean, they're... sort of... radical, huh? Like invading.. uh.. space and...
..anyway.. now, look; just because I wear a grey suit and chase the odd ambulance doesn't mean I'm not "cool". That said, without wishing to sound "square" or like some kind of "fuddy-duddy" as I understand you young people to say, I nonetheless have to point out that if you're thinking of trying this at home, you should read this disclaimer first.
Oh hey, David, that'll be £495 for my advice. Plus..uh.. VAT. Just make the cheque out to my Cayman Island subsidiary as usual, cheers.

AFF7